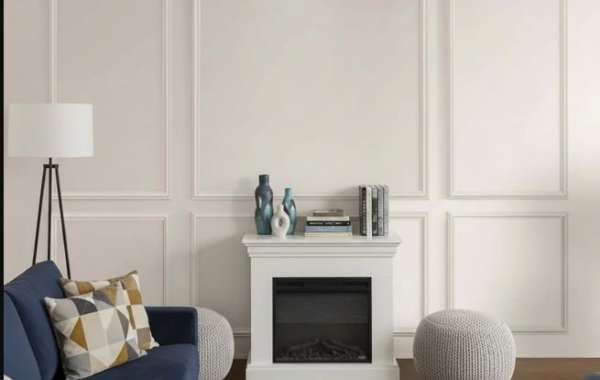
Self-adhesive wall molding kits revolutionize home decor, offering peel-and-stick elegance that skips nails, mess, and fuss for instant sophistication. These pre-cut strips of polyurethane or foam molding come with strong adhesive backing, mimicking high-end crown, baseboard, or chair rail profiles at a fraction of traditional costs. Perfect for renters or quick refreshes, they adhere to smooth surfaces like paint or tile, transforming drab walls in under an hour. No ladders, no putty—just unwrap, align, and press for a pro look anyone can achieve. In a world of fast living, these kits deliver style without the sweat.
The Rise of Peel-and-Stick Simplicity
Fueled by the DIY boom and social media makeovers, self-adhesive molding kits exploded in popularity around 2020, as folks sought affordable ways to elevate rentals and starter homes. Brands innovated lightweight, flexible materials that curve around corners effortlessly, ditching brittle plaster for forgiving foam. Early versions stuck briefly, but today's double-sided tapes rival construction glue, holding through seasons of humidity and bumps. This shift empowers beginners, turning "I wish" into "wow" without demo days. It's decor democracy—elegance for all, minus the contractor bill.
Inside the Kit: What's Included for Ease
A typical self-adhesive wall molding kit packs everything for seamless setup: 10-20 feet of molding in chic profiles like dentil or egg-and-dart, pre-applied adhesive, corner connectors, and end caps for flawless joins. Some include measuring tapes, levels, and touch-up caulk in neutral shades. Profiles vary from subtle ledges to ornate swirls, all primed for painting. Compact boxes fit in a drawer, ideal for apartments. No hunting hardware stores—just open and go, with color-coded pieces simplifying intricate patterns even for first-timers.
Step-by-Step Magic: Installing in Minutes
Kick off by wiping walls dust-free, then measure and mark with pencil lines for straight runs. Peel the backing slowly to avoid stretching, position at a slight angle, and press firmly from one end, smoothing bubbles with a cloth. Overlap corners slightly, trim excess with scissors, and reinforce with kit caulk for gaps. For ceilings, enlist a buddy or use painter's tape as a guide. Dry in 24 hours, paint if desired—voilà, custom trim. This no-tool tango suits busy weekends, yielding museum-quality results without sawdust storms.
Perfect for Renters and Temporary Glow-Ups
Renters rejoice: self-adhesive kits remove cleanly without wall damage, leaving landlords happy and deposits intact. Stick up baroque frames in a bland bedroom or subway-tile borders in kitchens, then peel away for move-out. Ideal for seasonal switches—like holiday garlands on festive moldings or summer florals on baseboards. In Lahore's rental-heavy scene, they brighten compact flats without permanence. This flexibility turns transient spaces into personal havens, proving style needn't own the lease.
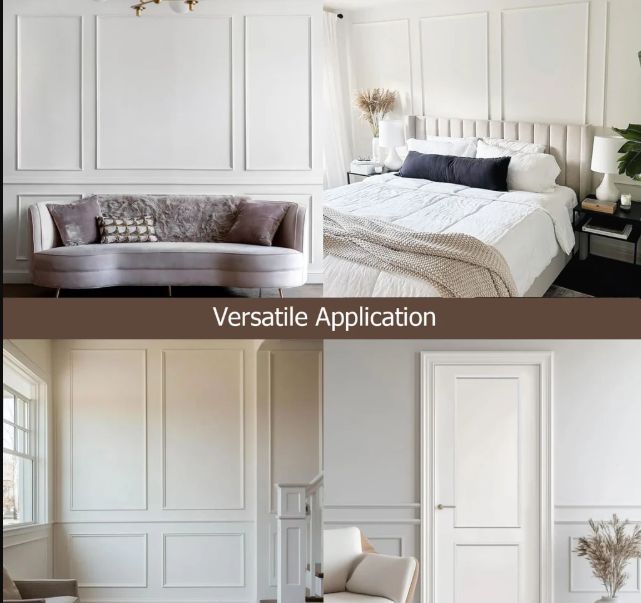
Blending with Diverse Design Aesthetics
These kits adapt to any vibe, from boho nooks with gold-painted medallions to Scandi minimalism via crisp white ledges. Layer over shiplap for coastal cottages or pair with velvet walls for moody glamour. In eclectic homes, mix profiles—floral crowns atop geometric bases—for playful pops. They scale for powder rooms or grand foyers, enhancing textures without clashing. Painters adore the blank canvas; hues from matte black to pastel mint unlock endless moods, making walls whisper your story.
Budget Wins and Durability Surprises
At $20-50 per kit, self-adhesive molding slashes costs versus carpenter fees or lumber yards, covering 100 square feet affordably. Surprisingly tough, they withstand kids' antics, pet scratches, and steamy showers if sealed. Adhesives flex without cracking, and foam cores resist dents better than wood. Longevity hits 5-10 years with care, outpacing expectations for "temporary" fixes. ROI shines in resale—upgraded trim boosts curb appeal, netting thousands. Smart, savvy savings wrapped in beauty.
Maintenance Tips for Enduring Freshness
Keep it pristine with a damp microfiber cloth and mild cleaner—no abrasives to mar the finish. Dust grooves gently with a soft brush, and refresh adhesive edges yearly with gel dots if needed. Avoid direct steam; opt for vinegar sprays on grease-prone spots. For painted kits, spot-touch with matching acrylics. In humid climates, ensure good airflow to prevent edge lift. Simple habits ensure they stay crisp, turning one-time installs into decade-long delights without rework.
Endless Ideas to Spark Your Creativity
Dream up gallery ledges for art displays, or frame mirrors with ornate kits for vanity drama. Kitchen backsplashes gain dimension with border strips, while headboards pop in bedrooms. Outdoor kits weather patios modestly. Kids craft forts under whimsical crowns; offices frame monitors sleekly. Combine with wallpaper for hybrid magic. These sparks ignite personalization—your walls, your rules, infinite reinvention awaits.