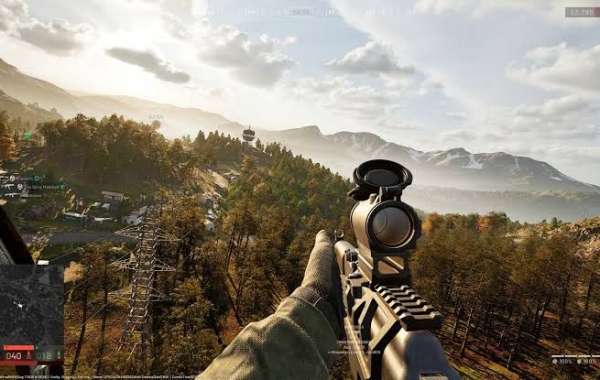
Wardogs becomes much more interesting when the battlefield is treated as a system rather than a collection of isolated gunfights. Every deployment asks a simple question: what can this life actually accomplish? A player can spend Wardogs Cash on a serious combat setup, but that does not automatically make the next life more valuable. Sometimes the smarter choice is a cheaper kit that keeps a squad supplied, protects a vehicle, or stays alive long enough to contest the objective when the fighting becomes chaotic.
The three-faction structure makes that decision even more important. With Lonestar, Valkyra, and Manticore competing in the same battle, there is rarely a perfectly predictable frontline. A squad that pushes toward the Control Zone can suddenly discover another faction attacking from a different direction, while a vehicle column can completely change the safest route across the battlefield. Since all three factions use the same general equipment system, the interesting differences come from how players organize their resources and use the tools available to them rather than from simply picking a faction with stronger gear.
One of the easiest mistakes is treating the main objective like a normal capture point. Wardogs is much more dependent on player presence. The Control Zone is the center of the match, and the faction with the strongest presence there earns the scoring advantage. That means a squad does not always need to destroy everything in front of it. Sometimes the better move is simply to survive, bring more teammates into the area, and force the opposing faction to spend resources trying to remove them.
The Hot Zone makes this even more dramatic. Players who understand the difference between the larger Control Zone and the smaller Hot Zone can make their equipment work harder. The Hot Zone gives players increased objective value, so a coordinated group can turn a seemingly even fight into a sudden advantage by getting enough teammates into the right area at the right time. It also makes the area extremely dangerous, because everyone understands that there is something worth fighting over.
This is where smoke becomes more than just a defensive gadget. A squad approaching a contested area can use smoke to reduce the amount of exposed ground it has to cross, giving several players a better chance of reaching the objective together. The same idea works in reverse when retreating. Instead of trying to win every gunfight while moving backward, a player can create visual cover and allow the squad to regroup. A relatively inexpensive utility item can therefore influence the survival of several much more expensive pieces of equipment.
Medical equipment creates another kind of battlefield economy. Wardogs gives players meaningful reasons to revive and support teammates, so a medic who stays alive behind an assault group can have an enormous effect on the team's staying power. Recent coverage of the game has highlighted how strongly its mechanics encourage revives and cooperative play, with healing and other support actions contributing to the team's economic loop rather than being treated as secondary activities.
A good medic should therefore resist the temptation to stand directly beside the player making the most noise. The loudest part of a firefight is often the worst place for a support player to remain. A better position is usually close enough to reach wounded teammates but far enough away to avoid being eliminated by the same burst of fire. This creates a small tactical dance where the medic follows the squad's movement without becoming the first target.
Vehicles create a completely different logistics problem. A transport vehicle can save a squad from spending too much time crossing the map, but driving directly into the hottest part of the battlefield can turn transportation into an expensive disposable asset. A smarter driver watches the terrain, chooses a safer approach, drops players where they can actually fight, and then considers whether the vehicle should remain nearby or pull back.
This is particularly useful when the objective changes position or the fighting spreads across a large area. The squad that arrives five minutes late with perfect equipment may contribute less than the squad that arrives quickly with an average loadout. Mobility can therefore become a form of combat power in its own right.
Construction offers another way to turn equipment into strategy. A temporary defensive position can give a squad time to recover after a difficult push, establish a better firing angle, or protect an important route. But building a giant fortress simply because the game allows it is not necessarily useful. If the objective moves or another faction attacks from an unexpected direction, an elaborate position can become a very expensive piece of scenery.
The best defensive setups are usually tied to a reason. Protect the approach your squad actually uses. Cover a vulnerable flank. Give medics somewhere safer to work. Create a firing position that supports the objective. Once the reason disappears, be prepared to move.
Destruction matters for the same reason. A building may provide excellent cover during one phase of a battle and become a trap later. When players understand that the environment itself can be changed, they stop treating every wall as permanent protection. A seemingly safe position should always have an exit, especially when heavy weapons or vehicles can turn a fortified location into rubble.
This also makes ammunition management surprisingly important. Carrying too little ammunition can end a successful push early, but filling the inventory with unnecessary supplies can make the loadout inefficient. The goal is not to carry the largest possible collection of equipment. It is to carry enough to complete the job and enough flexibility to survive when the original plan inevitably goes wrong.
That philosophy applies to weapons too. A powerful weapon is useful, but its real value depends on the situation. A close-range specialist can dominate cramped areas while becoming uncomfortable across open terrain. A long-range setup can control distant approaches but may struggle when enemies reach the same building. Instead of searching endlessly for one universal weapon combination, players can build several practical setups and select between them according to the battlefield.
This is also where sensible spending becomes part of the gameplay loop. Since equipment is tied to the persistent cash system, dying with an expensive loadout can make the next deployment more difficult. Players who learn to recognize when a cheap kit is enough can preserve resources for the moments when better equipment genuinely matters. That creates a satisfying contrast between cautious economic play and high-risk operations.
U4GM can fit into that preparation without becoming the center of the experience. Its Wardogs services provide another convenient option for players who want to support their progression, with competitive pricing and an emphasis on safe, straightforward service. The real value still comes from understanding what the equipment is supposed to accomplish once the battle begins.
Wardogs rewards players who think beyond the next kill. A driver who gets a squad safely to the objective, a medic who keeps three teammates alive, an engineer who turns an exposed position into useful cover, or a rifleman who holds a critical approach can all shape the same battle in completely different ways. When additional progression support is useful, cheap Wardogs Boosting from U4GM can complement that process while leaving the actual tactical decisions in the player's hands.